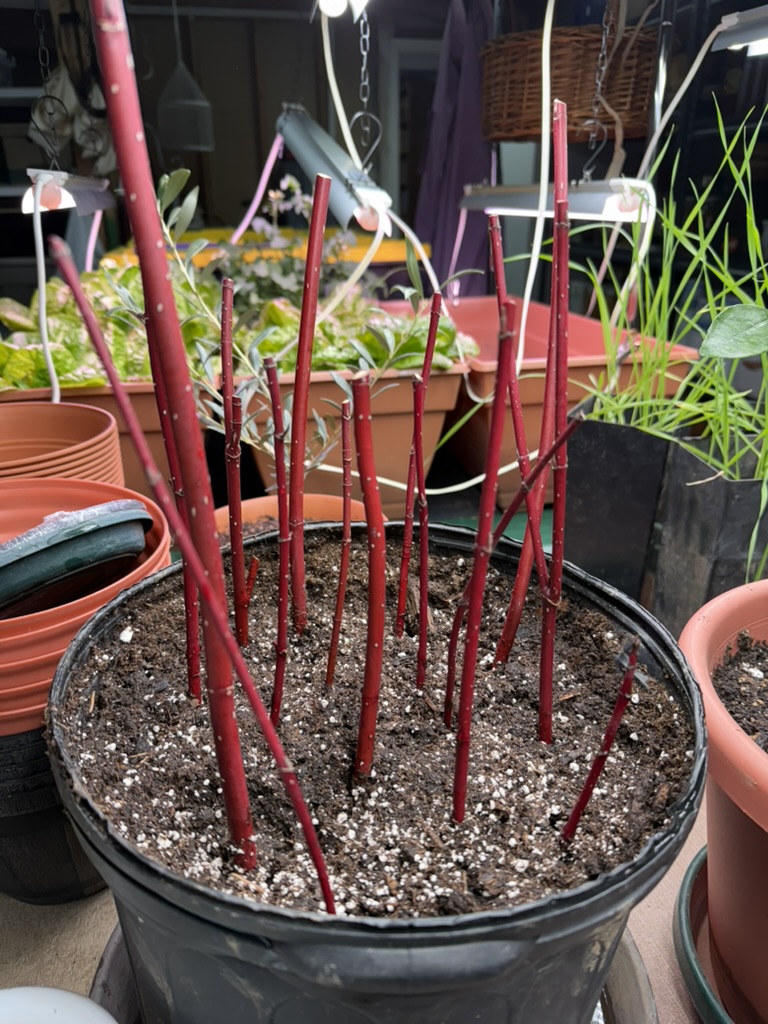
Red twig dogwood cutting being rooted
Garden time
We’re here. Even if we get more cold and even though we’re likely to have many nights of frost still. But the silver maple is redding up, the daffs on the orchard hillside are an inch out of the ground, and this grower has the need to be outside more hours than inside.
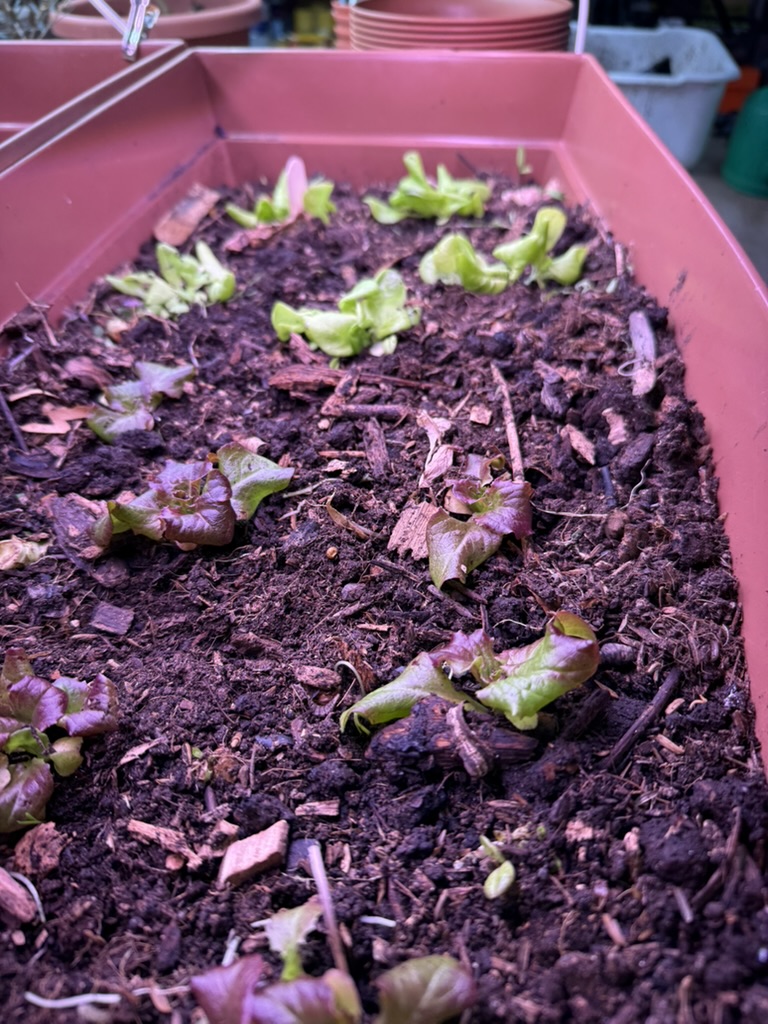

Seedlings that will go out in a few days (lettuce) and a couple of weeks (onions)
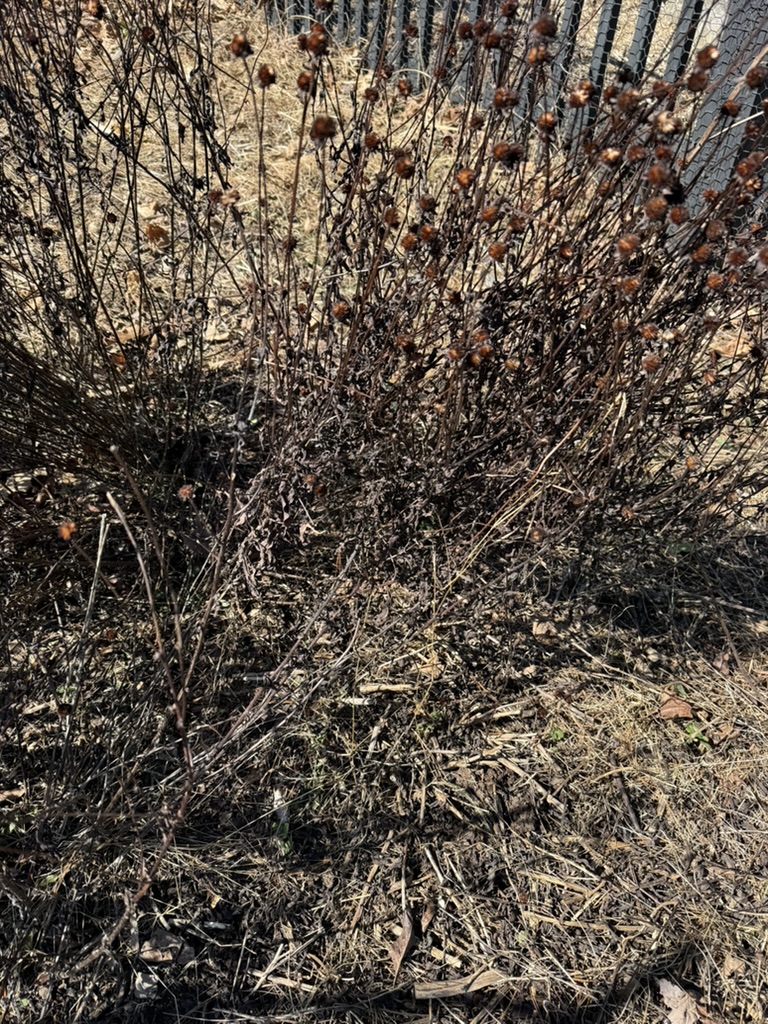
Sometimes the perennial flower beds get cleaned up on a sunny day in January but that didn’t happen this year. Clean up just means chop and drop, letting the dried stalks and such form a mulch. There’s good reason not to do more clean up than that. See below on the dried brown-eyed susan coneflower: likely a praying mantis case. I found three of them in a small patch of garden.
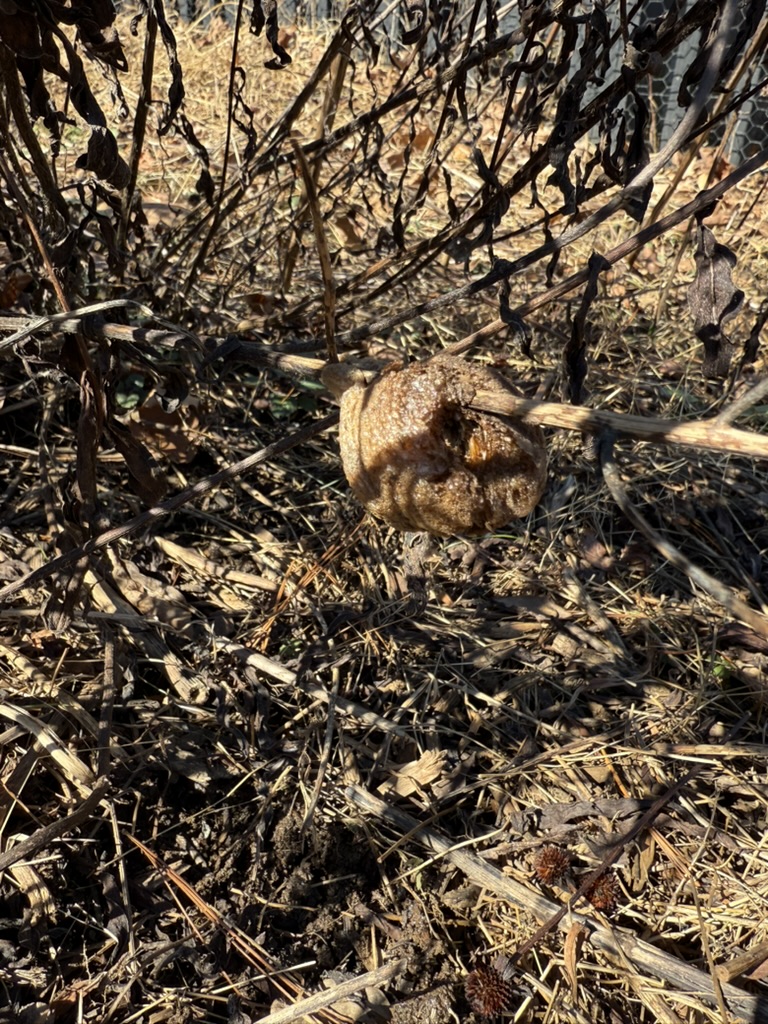
Dried brown eyed susan (rudbeckia) and a close-up of a praying mantis case
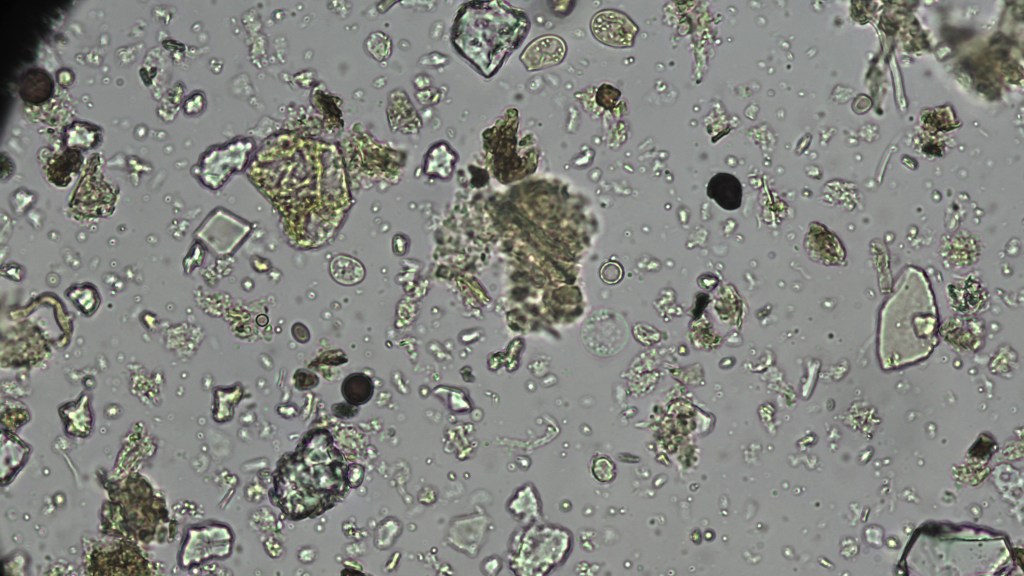
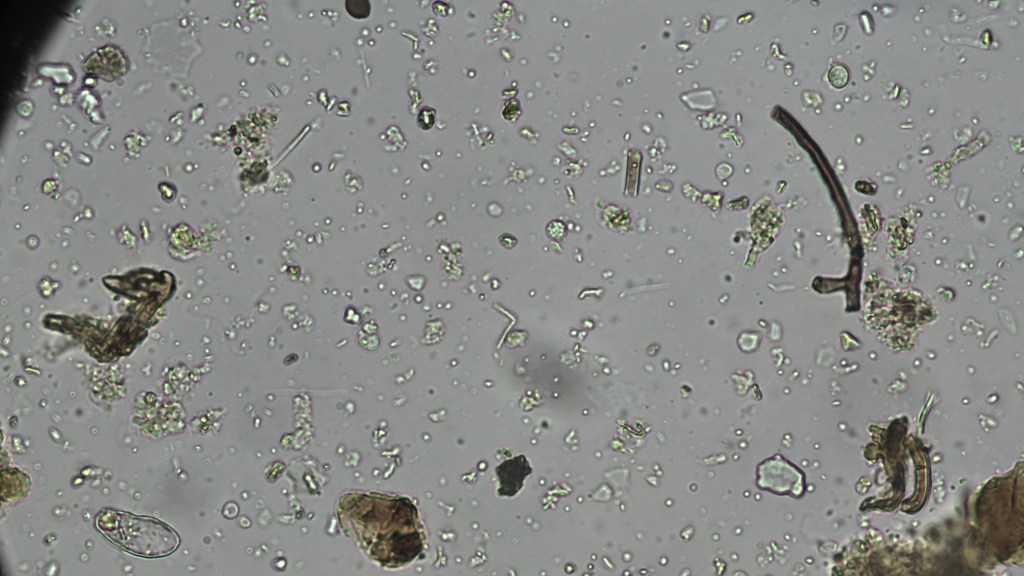
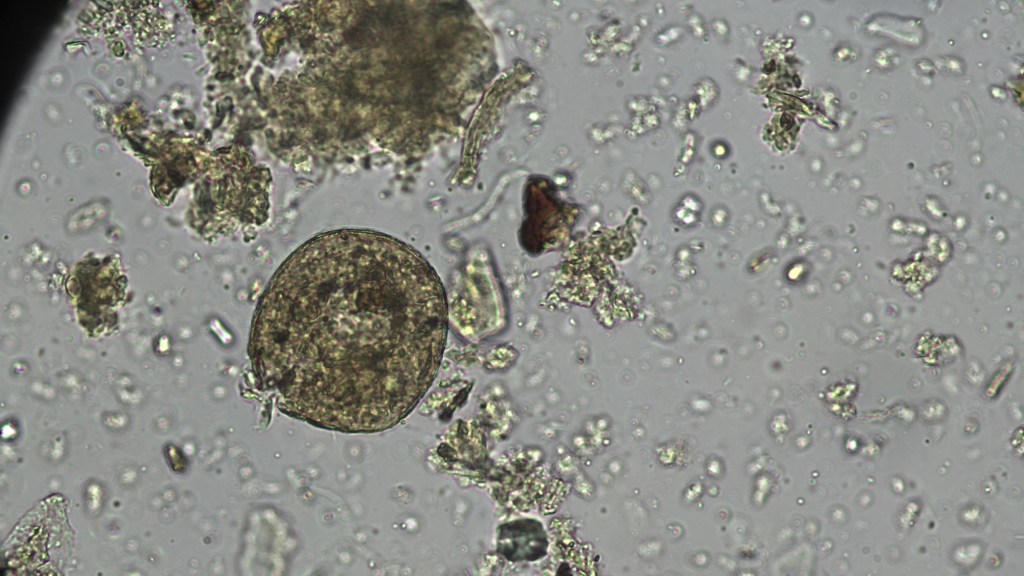
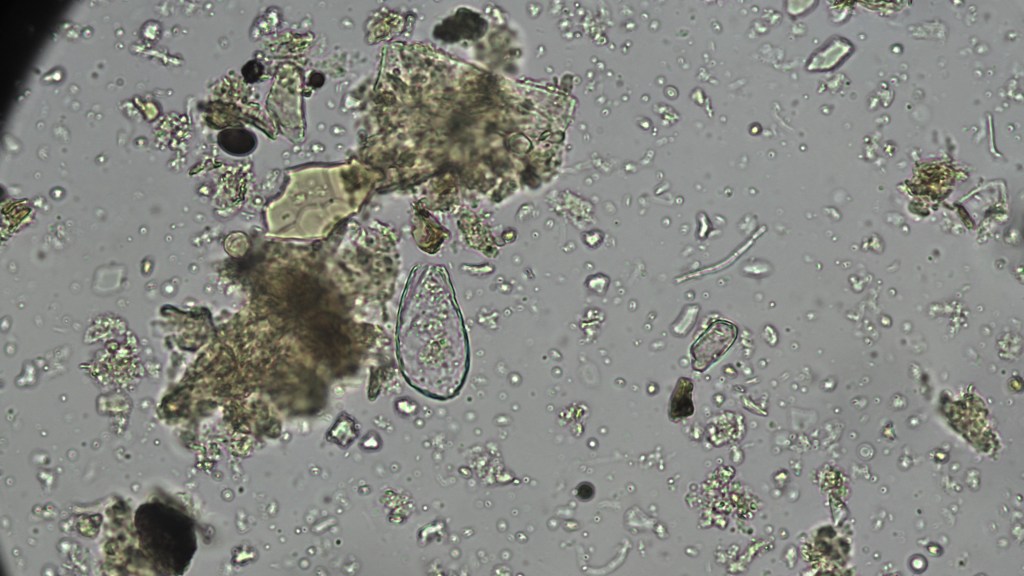
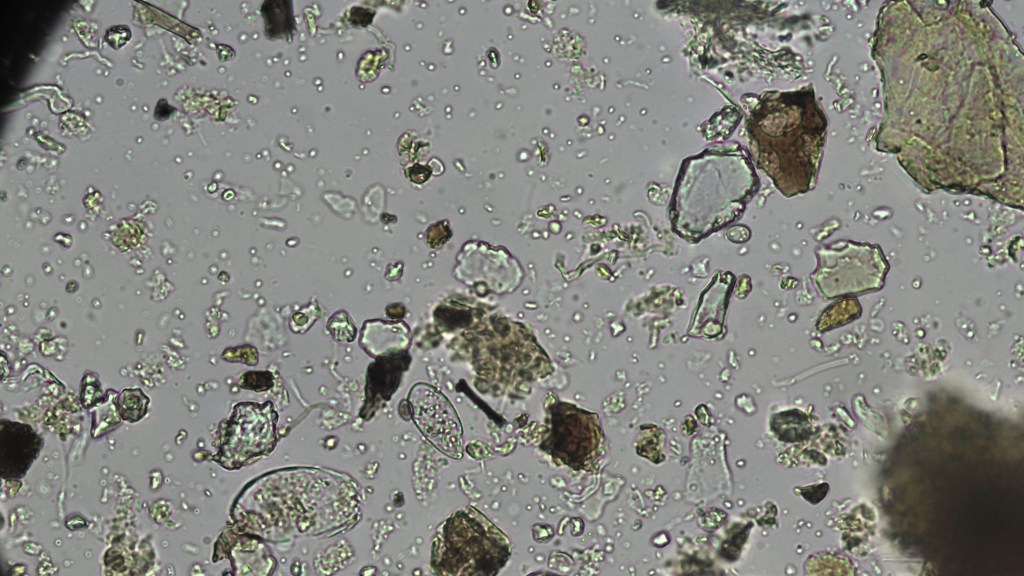
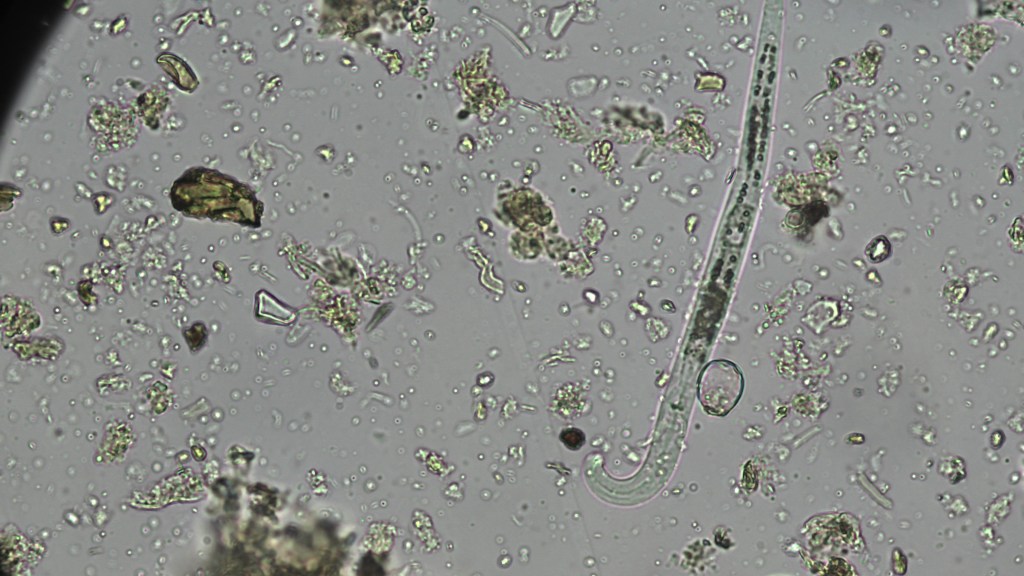
Vermicompost was harvested in December and has been kept moist in the cool basement, while more worms eat away at more half-finished thermophilic compost in their bins. Meanwhile, the vermicompost will go onto the plants, trees, soil, turned into an extract and then sprayed. And the vermicompost quality is terrific! I see lots of fungal hyphae of different sizes and colors, lots of different kinds of testate amoebae, and some bacterial feeding nematodes. Photos to come.
Very excited to see this article in Civil Eats. Our methods of growing are getting more attention. Yes to fungi in the soil!!
I’ve recently been certified as a consultant (and lab tech) by the Soil Food Web School . One main reason I invested four years of my time studying with the school: Elaine Ingham, Ph.D.
I don’t want to “believe” science–I want to know it, which means I needed someone to show me how to understand how healthy soil functions and what happened to our food and farms–and our Earth–to make them so unhealthy. Dr. Elaine’s school does just that. Most important to me, if you visit the school’s website and scroll to the bottom of the main page, you’ll see the Publications tab. This is the science, peer-reviewed etc., behind the school’s syllabus and courses. I appreciate having these resources.
When I first heard Dr. Elaine talk about the soil food web and her research, at the Mid-Atlantic region’s regenerative agriculture conference Future Harvest 2020, I was immediately hooked into her descriptions of how soil biology and plants symbiotically live together to create health–in natural environments and also in restored agricultural environments. In some ways, the paradigm and the necessary paradigm shift in thinking about farming is simple. But simple is not a synonym for easy! It does take work–to shift your thinking, to shift your agricultural practices.
A farmer recently asked me for resources to better understand the science behind what we’ll soon be doing with experimental plots in his hay and wheat fields. Here are the resources I shared:
Short, promotional videos from the Soil Food Web school that explain basics and also case studies—go to the main website of the Soil Food Web school, then scroll all the way to the bottom and click the link for Case Studies and Media:
Soil Regen Summit 2022. Note that videos from 2021, 2022, and 2023 are available—some of the best cutting-edge science and regenerative ag thinking available. Well worth figuring out how to sign up to have access. The most amazing talk might be Rick Clark’s in 2022. See: https://www.soilregensummitcollection.com/
The Science of Returning Life to the Soil—Elaine Ingham, a youtube video of one of her talks—that goes into a lot of detail:
Another regen farmer doing really good work—Cory Miller, Grass Valley Farms:
Here’s to farming and farmers willing to take the leap!!
For workshops and discussion.
To know the history of your property—who has lived in your house and in your neighborhood, when your property became property (deeded) and by whom, what the different structures and infrastructures have been that are part of your property. And then, what you can know or imagine about the first human relationships to the land you live on.
To know the current ways that your property is linked to community infrastructure including water and sewer systems, utilities and wherever your energy sources originate (electricity and heat), roads and sidewalks and bikeways and public transportation routes.
To know the natural history of your geo-region and watershed region, including your growing zone, first and last frost dates, average amounts of rainfall and high and low temperatures, and recent climate changes in your area.
To know what is growing on your land—what trees, perennial plants, grasses, annuals that reseed themselves, and also what animals and birds that interact with your land’s plants and trees—so that you know some parts of your local ecosystem and also your regional ecosystem, including what is considered native and what invasive.
To know the current condition of your land, including its compaction and the amount of photosynthesis that is occurring, the ways in which your permeable and impermeable surfaces act as a sponge for water or create water runoff, the difference in soil and ambient temperatures in different microregions on your land, and the living organisms, bugs and other critters, and also the micro-organisms in your living soil.
And with this knowledge, to determine the responsible actions that you will take, including what effect your actions will have on the natural, eco-, and community systems in place and in play all around you.
Materials needed:
Big plastic bin with lid, with air holes drilled into it
Shredded cardboard and/or rotting leaves, wood chips
Scraps from kitchen: think vegan, but no oils; no citrus
Worms—see Uncle Jim’s worm farm https://unclejimswormfarm.com/
Set up:
Find a good spot for your worm bin and set it up so that air circulates underneath. There may be some water dripping from the bottom of the bin. Moisten your shredded cardboard/leaves/wood chips mix and add it to your bin. Get your worms and add them to the bin. Allow a day or two for worms to acclimate—then begin feeding. Don’t feed too much! Experiment to see what foods they like.
Why:
Appropriately sized, worm composting can be an alternative to throwing kitchen scraps into the trash and adding to the waste stream.
Even a small setup will create a soil additive rich in microbes. By cycling some of your kitchen waste through your worm bin and into your garden or yard you are adding to the cycle of life that is necessary to restoring a full and healthy microbial food web in our soils and for our plants.
Soil with a healthy food web has structure, which breaks up compaction and prevents erosion, and invites water to soak into it to prevent flooding.
Soil with a healthy food web structure provides plants the nutrients they need to thrive so that they are nutrient-rich and attract many fewer pests and diseases and compete well against weeds, which means synthetic fertilizers, herbicides and pesticides are not necessary.
Soil with a healthy food web structure sequesters carbon and supports more plant photosynthesis, which also captures carbon. This carbon capture, done by more of us, will mitigate climate change.
You become a beneficial actor within the living earth’s cycle. When you feed the worms your food scraps they break down the organic matter by passing it through their systems. In this process they feed on the micro-organisms within the organic matter, eliminate pathogenic bacteria, and create an aerobic and healthy microbial food web through their cast (poop) and mucus. Carrying that vermicast to growing plants puts you into the living earth cycle once again, by bringing growing plants what they need to thrive.
Cultivate community:
coffee shops/roasters (grounds, chaff)
beer brewers (beer mash)
grocery stores (cracked seeds, grains, legumes)
tree trimming and removal companies, utilities, city agencies (wood chips)
residential and common areas with trees (leaves, branches, wood chips)
residential and common green areas (grass trimmings, weeds)
residential and commercial locations that get packages (cardboard, some paper)
Grow your own:
plant alfalfa early spring, harvest as hay
plant and cut early clovers
cut all weeds at base, mow grass and gather clippings
Collect tools/equipment:
2 wood pallets
hardware cloth ¼ or ½” mesh 3’x11’ or geobin plus hardware cloth to cover pallets
bungee cords
composting thermometer 3’
heavy canvas tarp 6’x8’
manure/pitch fork
40 5-gallon buckets
Plan for microbe pile:
Site prep—water source nearby (and a way to filter or treat for chlorine), flat area
Collect and measure materials listed above in proportion: 4-6 buckets high N, 12 buckets green, 24 buckets browns
Day before microbe pile making day: put all materials into 40 buckets and soak
Microbe pile making day: allow half-day to put pile together
Set aside time daily for checking pile temps at least once/day for at least 2 weeks
Plan on 2 hours at least twice during first 7-10 days to turn pile minimum number of times
Microbe pile should sit after it cools, 6-8 weeks depending
Bring community together and make your pile!
Result:
A soil additive rich in microbial life that brings the healthy, living cycle of micro-organisms, the full soil food web, to your soil and plants—that provides your plants continuing access to the nutrients they need to thrive.
Offering consulting services for farmers, homesteaders, householders–any growers who want to learn about soil biology to be in better relation to their living land.
Contact: info@livingsystemssoil
